HOW TO CLEAN YOUR AIRBRUSH
How to clean your airbrush
Airbrushing is fun and it can give you a stunning finish over almost any surface. Be it makeup, usual painting, or art; airbrushing can change the game.
The reason why airbrushing is not very common is because buying an airbrush is kind of a big investment. And you surely don’t want to waste your money by improperly handling your airbrush. When you buy something new, it is important to know how to take care of it if you want to keep it smooth and new for as long as you can.
It is very crucial to properly clean your airbrush and make sure that it stays smoothly functioning and operating. If you are a beginner, then you probably won’t have any idea about how to clean airbrush.
If you are one of those beginners, searching the internet for all the answers, then you have landed in the right place. In this blog, we will tell you all that you need to know about cleaning your airbrush.
Here are some handy dandy tips on how to clean airbrush

UNDERSTAND YOUR AIRBRUSH
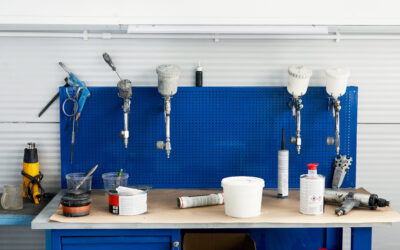
Let’s start by understanding your airbrush better. There are four basic components to your airbrush.
- The cup is a hollow cavity at the top of your airbrushing gun
- There is a needle cap at the very tip of your airbrush kit
- The Hose connecter is situated at the bottom of your airbrush gun
- And lastly, there is a trigger just near your cup.
Now that you can put a finger on all the parts, let’s move to the actual cleaning.

Do not use hot water
The very first and the very basic tip for airbrush cleaning is that you should not use hot water to clean your airbrush. Your airbrush gun contains plastic gaskets that can be destroyed or warped if you use extremely hot water to clean your airbrush.
How to clean an airbrush?
THE CUP
The cup is where you put the pigments when you’re airbrushing. Once you’re done airbrushing, it is very important to clean this cup. This will make sure that your next airbrush is as swift as a feather.
To clean the cup, add some warm water to the cup and dunk it out in the trash can. Plug in your airbrush gun and dunk the needle and cup into a bowl of warm water while your airbrush is still on. The gun is connected to a rubber hose and you will not be shocked as long as the mini airbrush compressor and the power cord are not touching the water.
Make sure that you let the water run for a few minutes until all of the colors are out of the cup. You can also make the process easier by pulling and releasing the trigger a few times to leverage the particles out of the end cap and the needle. If your water turns murky, replace the water bowl and continue rinsing.
After you remove your gun from the bowl of warm water, put your finger on the needle and pull the trigger. This will make the airflow back into the nozzle and make sure that all of the colors can easily get out of the gun.
When you will put your finger over the needle cap and press the trigger, you will see bubbles forming. Once you are done with the process, you need to double-check and make sure that all the color particles are removed from the gun.
Here is a small tip for you,
When you are sure that your cup is finally clean, you can spray over a white napkin or a paper towel to ensure that there is no left over color in the gun. If you do not see any color or pigment staining your napkin or paper towel then it means that your gun is completely clean.
You can also use airbrush cleaners to make your airbrush squeaky clean. Just add a few drops of dishwashing liquid into your water and rinse your airbrush gun extremely well when you are done. You will not wish for your airbrush gun to dry with bubbles in it, because it will harm your gun.
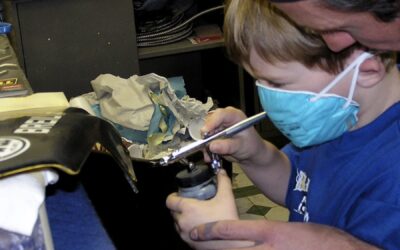
THE NEEDLE
The needle is a very important component of your gun. While cleaning it, you need to take extra care and make sure that you do not harm it. If nothing is coming out of your needle and your trigger is loose, then it can be solved by soaking your airbrush in warm water. The gun is specifically designed to not rust which means that it will be fine even if you soak the gun underwater for a day or two. The soaking will help with unclogging the gun needle and it will start working just fine.
Lastly, there is usually a little wrench involved in your airbrush kit. But very few people know what it is supposed to do. Well let us tell you, it is used to remove the needle cap and curdle your gun. If you use your airbrush kit quite a lot then you will probably need to curdle your gun every once in a while. To curdle your gun, all you will need to do is take the needle cap and nozzle out so that the water can reach inside the gun. There is no need to take the long needle out.
Use the wrench to loosen the needle cap and nozzle and carefully slide it off without touching the needle. Once your nozzle and needle cap are out of the way, you can soak them under water to give them a proper cleanse.
When you take it out of the water and dry it, you can put all the components back together and you will be all set and ready to swiftly airbrush anything you want.
We hope that we made it a little easier for you and took the scary part of the entire airbrush cleaning process. Keep your airbrush smoothly running with these basic airbrush cleaning tips.
USEFUL RESOURCES FOR AIRBRUSHING
Thin Acrylic Paint for Airbrushing
Acrylic paints are great for airbrushing because they’re water-soluble and can be thinned with water.

Airbrush Nails
Airbrushing nails is a great way to create a flawless manicure that lasts, and when you airbrush nails you can get super creative with your manicure.

Airbrush Flames
Airbrushing flames on cars, motorcycles, shirts, and people is a popular customization for people who want to add some personal flair to their ride or styles. This guide will walk you through all the steps of the process, so that you can be confident in your abilities!
Airbrush for Beginners
For a beginner, it’s not a big deal to master airbrushing. It’s merely a game of determination and practice.
Airbrushing Ideas
Airbrushing IdeasAirbrushing is a great way to add a bit of fun and flair to any project, and these ideas are sure to help you get started. Easily add a bit of extra flair to your t-shirts, nails, makeup, cakes, or tattoos with our airbrushing...
Compressors
Airbrush compressors are the heart of an airbrushing system. They are used to provide a constant flow of air to your airbrush. The air is supplied from an air tank, which is filled with compressed air. Airbrush compressors create a constant, steady flow of air that is needed by your airbrush to produce fine lines and detailed artwork.